Monday 23 January 2012

More pictures for the record

This post is primarily to add further pictures of the engine overhaul, for my own use as they may be important at some future point, and also to help others who might be involved in similar work on the Kelvin J series.  Once you start the overhaul it seems that you keep taking parts off the engine all of the time, and a full-running engine now seems a long way away as the various parts are attended to.

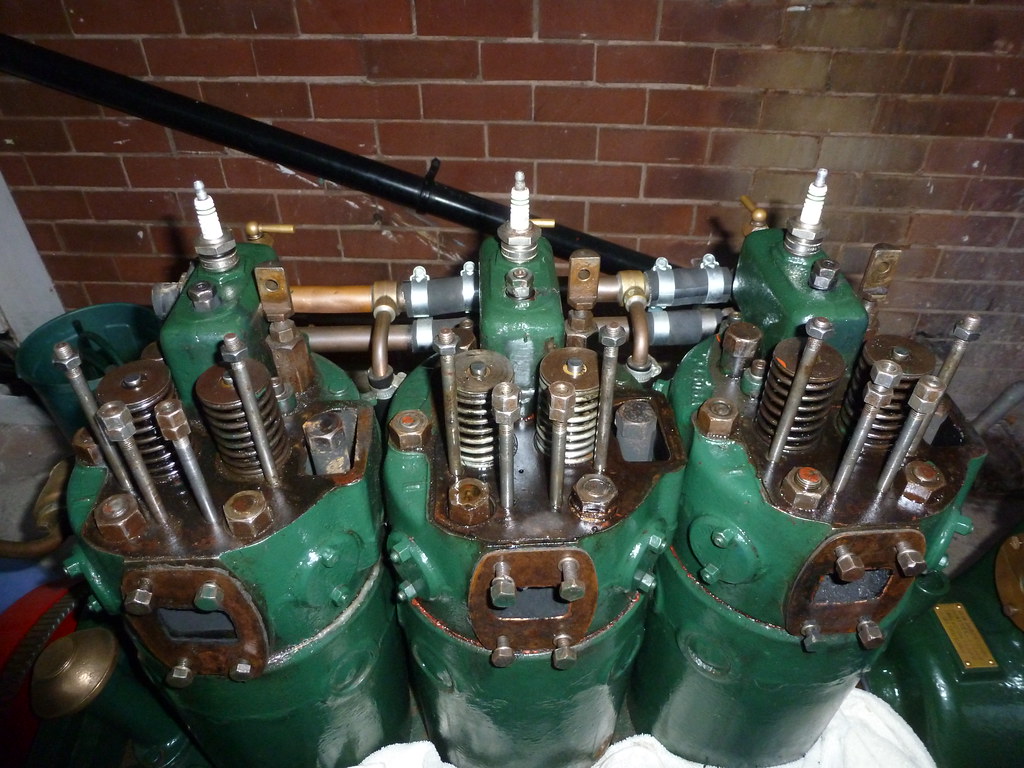
So far things have been pretty routine as far as the overhaul [famous last words!], and I look forward to the point where we can start putting the parts back on the engine and building it up! ... that will happen before too long.


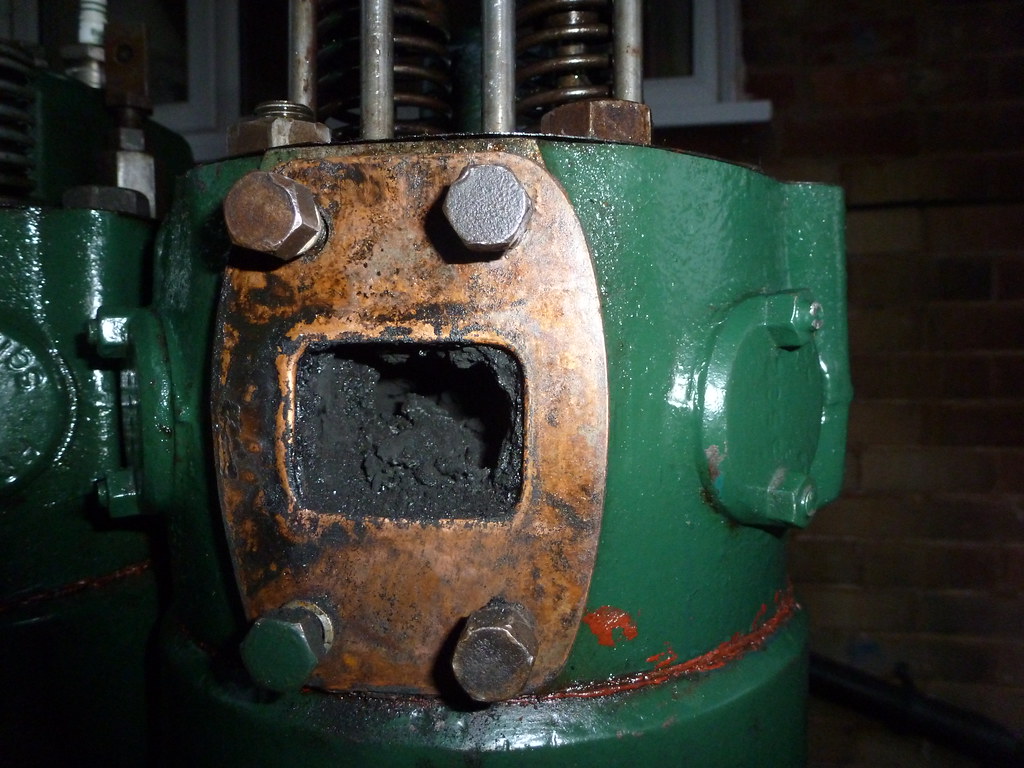
It can be seen from the third of these pictures just how coked-up the exhaust ports were on the engine, which can't have helped with the efficiency of the engine.  This means that we will have to take the cylinder heads off to look further at the valves, as they may similarly be coked-up.  


Monday 2 January 2012

The Kelvin J3 in pictures

It's important to take pictures during any engine overhaul, and I've tried to do this so as to (i) remember how everything goes back together [although to be fair I am also very much relying on expert help!] and (ii) to see the changes in the engine during the period of the refurbishment.  After having checked the engine for major problems and having undertaken a pressure test of the cylinders which appeared satisfactory, the plan has been to overhaul the key components of the engine such as the water pump, governor, injection pump, magneto etc.  I set out below some of pictures of these parts as certainly during this rebuild it has been difficult to find good pictures of these from other engines:


Many of the engine parts have been ... or shortly will be ... rerubished in the period before the shell is ready, and in the following post I show some of the parts that have been overhauled.